


Genshin Impact Mitya Complete Build Guide

Mitya arrives in Genshin Impact Version 7.2 as a premier 5-star Electro Catalyst unit engineered around the revolutionary Stellar-Conduct elemental reaction and Elemental Mastery scaling. Featuring an intuitive dual-stance architecture, Mitya seamlessly switches between an on-field Charged Attack hypercarry and an off-field sub-DPS who provides massive teamwide Elemental Mastery and reaction buffs.
This comprehensive guide details everything required to build and deploy Mitya at peak efficiency: core mechanics, full talent scalings, Constellations, talent and ascension material requirements, signature and free-to-play weapon rankings, optimal artifact sets and target stat benchmarks, synergy-tested team comps, and exact combat rotation blueprints.
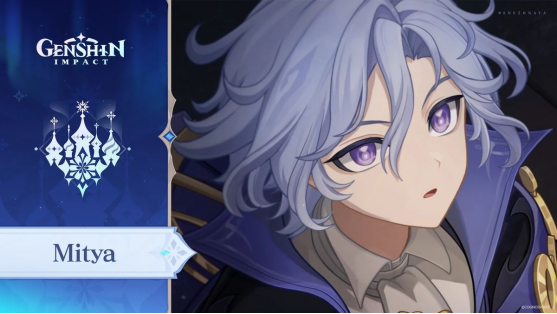
Character Overview and Core Mechanics
Core Profile and Combat Roles
At his foundation, Mitya transforms standard Superconduct reactions into high-impact Stellar-Conduct detonations. Unlike traditional Electro carries who scale primarily with ATK% and direct Electro DMG bonuses, Mitya's damage is deeply rooted in Elemental Mastery, turning reaction triggers into his core offensive engine.
| Attribute / Aspect | Details |
| Rarity & Element | 5-Star / Electro |
| Weapon Type | Catalyst |
| Primary Combat Roles | On-Field Stellar-Conduct Carry / Off-Field Sub-DPS Buffer |
| Signature Mechanic | Gradient Beacons & Detection Core Stance Switching |
| Key Stat Scaling | Elemental Mastery, CRIT Rate, CRIT DMG, Energy Recharge |
How Gradient Beacons Work
Gradient Beacons represent the fundamental tactical resource powering both of Mitya's combat stances. He holds up to 4 Beacons at baseline (expanding to 5 at Constellation 1). Crucially, these Beacons dynamically follow the active character rather than anchoring to a fixed geographic circle, enabling total battlefield mobility.
• Generation Window: Whenever the party triggers Stellar-Conduct, Mitya generates 1 Gradient Beacon every 1.5 seconds over a 3-second window (up to 2 Beacons per trigger).
• Extended Uptime: Beacons have a default duration of 6 seconds, which is extended to 10 seconds via his Ascension 4 (A4) passive talent.
• Stack Refreshing: Once Mitya reaches his stack cap, creating an additional Beacon refreshes the full duration of all currently held Beacons.
• Burst Catalyst: Casting his Elemental Burst instantly creates 3 Gradient Beacons, guaranteeing an immediate high-damage attack sequence.
• Overload Synergy: When his Detection Core is placed in Overload mode, his A1 passive doubles the Beacon generation window from 3 to 6 seconds, making it seamless to accumulate full stacks during on-field attack sequences.
Official Voice Cast
| Language | Voice Actor |
| English | Brian Ballance |
| Chinese | Su Shangqing |
| Japanese | Yusuke Kobayashi |
| Korean | Choi Woo-seong |
Complete Kit and Talent Analysis
Normal Attack: Chain Reaction
Mitya executes a 3-string basic attack sequence dealing Electro DMG. In his standard form, his Charged Attack consumes 50 Stamina to deal AoE Electro DMG after a short gathering animation. However, his kit transforms dramatically when his Detection Core enters Overload state:
• Gradient Detonation (Special Charged Attack): When Detection Core: Overload is active and Mitya possesses at least 1 Gradient Beacon, his Charged Attack transforms into Gradient Detonation. This special attack consumes zero Stamina and unleashes an initial AoE Electro hit. Holding the attack button continuously discharges stored Gradient Beacons, each striking for AoE Electro DMG calculated as true Stellar-Conduct reaction damage.
| Talent Effect (Normal Attack) | Multiplier at Talent Level 10 |
| 1-Hit / 2-Hit / 3-Hit DMG | 105.8% / 86.9% / 124.2% |
| Standard Charged Attack DMG | 246.4% (Consumes 50 Stamina) |
| Gradient Detonation Initial Hit DMG | 302.4% (Consumes 0 Stamina) |
| Gradient Detonation Stellar-Conduct DMG | 403.2% Elemental Mastery per Beacon consumed |
Elemental Skill: Principle: Variable Detection
Mitya deploys a mobile mechanical construct known as the Detection Core for 25 seconds (18s cooldown). Tapping or holding the Skill determines the operational stance of the Core, allowing players to adapt to off-field sub-DPS or on-field carry needs. Tapping the Skill within 6 seconds allows toggling between modes (1.5s switch cooldown):
• Steady State Core (Tap Skill): Summons the Core to hover near active party members, automatically firing off-field pulses that consume Gradient Beacons to deal sustained AoE Stellar-Conduct DMG. When duration ends or on recast, it detonates all remaining Beacons.
• Detection Core: Overload (Hold Skill): Enters hypercarry mode, priming Mitya's stamina-free Gradient Detonation Charged Attacks and extending the Beacon acquisition window to fuel sustained on-field barrages.

| Talent Effect (Elemental Skill) | Multiplier at Talent Level 10 |
| Tap Skill Initial DMG | 163.3% |
| Hold Skill Initial DMG | 233.3% |
| Steady State Core Basic Pulse DMG | 129.6% |
| Steady State Core Beacon Consumption DMG | 144.0% Elemental Mastery |
| Steady State Core Final Detonation DMG | 165.6% Elemental Mastery per Beacon |
| Detection Core Field Duration | 25.0 Seconds |
| Skill Cooldown | 18.0 Seconds |
Elemental Burst: Analysis: Gradient Theory
Mitya projects an intricate geometric matrix that deals devastating AoE Electro DMG based on both his ATK and Elemental Mastery, immediately conjuring 3 Gradient Beacons to reload his combat loops. With a low 60 Energy Cost and 15-second cooldown, it syncs cleanly with standard team rotations.
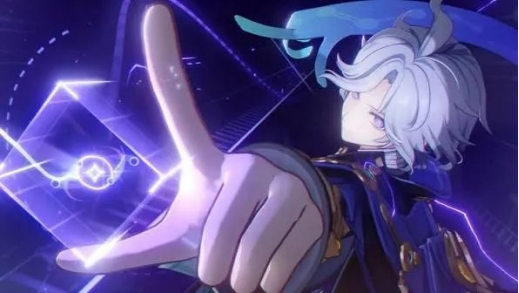
• Skill DMG (Level 10): 600.5% ATK + 1201.0% Elemental Mastery
• Gradient Beacons Generated: 3 Beacons immediately
• Cooldown / Energy Cost: 15.0 Seconds / 60 Energy
Passive Talents Breakdown
• Ascension 1 — Core Adaptive Synthesis: In Steady State, each Beacon held grants all nearby party members 30 Elemental Mastery (up to 120 EM). In Overload, triggering Stellar-Conduct generates 1 Beacon every 1.5 seconds for 6 seconds, doubling the resource window.
• Ascension 4 — Geometric Precision: Collected Beacons persist for 10 seconds. Furthermore, collecting a Beacon increases Mitya's CRIT Rate by 5% for 15 seconds, stacking up to 4 times (20% bonus CRIT Rate). Triggering again refreshes stack duration.
• Inherent Utility — Stellar-Conduct Evolution: Converts all party Superconduct reactions into Stellar-Conduct. Increases party Base Stellar-Conduct DMG by 0.028% per 1 EM, capping at a 14% bonus at 500 EM. When entering a Polestar Field, Mitya enters the Radiance: Stellar-Conduct state.
• Exploration Passive — Voxelrock Excavation: In Voxelrock zones, Steady State Core enters Excavation Mode to rapidly clear terrain. Additionally, consumes zero power when crafting Prime Ice Construct Basic Heat Sources.
Constellation Upgrades
Mitya's Constellations offer substantial quality-of-life enhancements, energy sustain, and exponential damage multipliers:
• C1 — Mathematical Induction: Increases max Gradient Beacon capacity to 5. Casting Elemental Skill immediately generates 1 Beacon. Active characters gain 40% CRIT DMG while the Core is active. Consuming a Beacon restores 10 Energy (triggers once every 8s).
• C2 — Coordinate Decoupling: Enemies inside the Core field suffer -20% Cryo RES and -20% Electro RES. In Steady State, grants all party members 123 EM; in Overload, grants the active character 234 EM.
• C3 — Recursive Deduction: Increases Elemental Skill Level by 3 (Max Lv. 15).
• C4 — Singularity Condensation: Every 5 Gradient Beacons consumed unleashes an extra instance of AoE Stellar-Conduct DMG equal to 300% of Mitya's Elemental Mastery.
• C5 — Axiomatic Derivation: Increases Normal Attack Level by 3 (Max Lv. 15).
• C6 — Continuum Breakthrough: Consuming a Beacon has a 34% chance to instantly refund 1 Beacon. All party members gain 20% Elevated Stellar-Conduct DMG, and party Stellar-Conduct reaction damage is further elevated by 20%.
Talent Leveling Priority
Your investment order depends strictly on your chosen battlefield deployment:
• On-Field Carry: Normal Attack (Max Priority) > Elemental Burst > Elemental Skill (Take to Lv. 6–8 for hybrid flexibility).
• Off-Field Sub-DPS / Support: Elemental Skill (Max Priority) > Elemental Burst (Optional / Utility) > Normal Attack (Can leave at Lv. 1).
Ascension and Talent Material Requirements
To optimize Mitya for Version 7.2 endgame, gather the following regional materials, monster drops, and talent books:
Character Ascension Materials (Level 1 to 90)
| Ascension Material Category | Total Required Quantity |
| Mora | 2,092,600 |
| Local Specialty: Crystalfold | 168 |
| Experience Books | 418 Hero's Wit + 3 Wanderer's Advice |
| Vajrada Amethyst Gemstones | 1 Sliver / 9 Fragments / 9 Chunks / 6 Gemstones |
| Normal Boss Drop: Shattered Stabilizing Anchor | 46 |
| Chimeric Mob Drops | 18 Chimeric Core / 30 Symbiotic Nucleus / 36 Prime Nexus |
Talent Upgrade Materials (Triple Crown Level 1 to 10)
| Talent Material Category | Total Required Quantity (3 Talents to Lv. 10) |
| Mora | 4,957,500 |
| Crown of Insight | 3 |
| Charity Talent Books | 9 Teachings / 63 Guides / 114 Philosophies of Charity |
| Weekly Boss Drop: Mask of the Virtuous Doctor | 18 |
| Chimeric Mob Drops | 18 Chimeric Core / 66 Symbiotic Nucleus / 93 Prime Nexus |
Best Weapons for Mitya
Signature Catalyst Analysis
Mitya's signature 5-star Catalyst provides Base ATK of 542 and an immense 88.2% CRIT DMG sub-stat at Level 90. Its weapon skill grants a flat 24% CRIT DMG buff. When casting an Elemental Skill, it activates Formula Association, granting 48 EM for 20 seconds. While active, teammate reaction triggers yield Formula Dissociation stacks (24 EM each, max 3 stacks = +72 EM; total +120 EM). Triggering Stellar-Conduct grants an additional 12% Stellar-Conduct CRIT DMG per stack (+36% maximum).
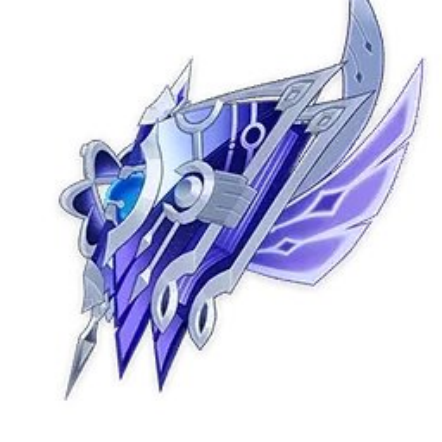
Crucial Build Note: Mitya's core Stellar-Conduct damage is reaction-based and does NOT benefit from standard Elemental DMG Bonus%, Skill DMG%, or Charged Attack DMG% modifiers. Focus strictly on Elemental Mastery, CRIT stats, and direct reaction multipliers.
Top Weapon Rankings and Alternatives
| Weapon Name | Tier / Rarity | Why It Excels on Mitya |
| Signature Catalyst | Best in Slot (5★) | Unrivaled CRIT DMG, up to 120 EM, and exclusive +36% Stellar-Conduct CRIT DMG. |
| Kagura's Verity | Competitive (5★) | Stat stick with 66.2% CRIT DMG; passive skill bonus does not buff reaction damage directly. |
| Winter's Heavy Heart / Dawning Frost | Great 4★ Option | Solid CRIT DMG sub-stat; scales exceptionally well with high refinements on carry builds. |
| Etherlight Spindlelute | F2P Top Pick (4★) | Provides Energy Recharge main stat and an active EM buff on Skill cast; stabilizes Burst uptime. |
| Fruit of Fulfillment | Craftable F2P (4★) | Accessible craftable Catalyst offering high EM stacking and ER for reaction consistency. |
Signature Weapon Ascension Materials
| Weapon Ascension Material | Quantity Required (Lv. 1 to 90) |
| Mora | 225,000 |
| Weapon Domain Mats: Ethereal Crystalscale | 15 Green / 23 Blue / 27 Purple |
| Elite Mob Drop: Snowborn Heart of Ignorance | 23 Green / 27 Blue / 41 Purple |
| Rare Boss Material: The Frost Emperor's Farewell | 5 Green / 14 Blue / 14 Purple / 6 Gold |
Best Artifacts and Stat Optimization
Recommended Artifact Sets

• Disenchantment in Deep Shadow (4-Piece) — BiS: The gold standard for Stellar-Conduct carry builds. Its 4-piece bonus enhances Stellar-Conduct reaction damage by a massive 40% and grants an extra 16% CRIT Rate to eligible hits against affected targets.
• Gilded Dreams (4-Piece) — High EM Alternative: Provides 80 EM baseline, plus 50 additional EM for each non-Electro teammate (+180 EM with two non-Electro units, +230 EM with three). Outperforms Deep Shadow in heavy Cryo-focused team compositions.
• 2-Piece EM + 2-Piece EM (Transitional): Combining Wanderer's Troupe, Gilded Dreams, or Paradise Lost gives +160 flat EM, serving as an effortless transitional setup while farming.
• Support Artifacts (Tenacity / Instructor): In pure off-field support roles where another unit cannot carry them, Mitya can hold Tenacity of the Millelith (via continuous Core pulses) or Instructor to buff team damage.
Main Stats and Substat Priority
| Artifact Piece | Optimal Main Stat |
| Sands of Eon | Elemental Mastery (EM) |
| Goblet of Eonothem | Elemental Mastery (EM) |
| Circlet of Logos | CRIT Rate / CRIT DMG (or EM if running heavy CRIT weapon) |
Substat Priority: Elemental Mastery (reach 500 EM cap first) > CRIT Rate & CRIT DMG > Energy Recharge (aim for ~150% on carry builds) > ATK%.
Target Stat Benchmarks for High-Investment Builds
• Elemental Mastery: 700+ EM (500 EM caps his team Stellar-Conduct passive, while excess EM directly magnifies his personal damage).
• CRIT Rate: ~64% displayed on profile. Combined with +20% from A4 passive and +16% from Deep Shadow 4pc, you reach a perfect 100% effective CRIT Rate in combat.
• CRIT DMG: 180% to 220%+ with signature weapon or high-refinement CRIT catalysts.
• Energy Recharge: 140%–150% for on-field carries desiring a Burst every 15s rotation; 110%–120% for off-field builds.
Best Team Compositions and Synergies
Because Mitya transforms Superconduct into Stellar-Conduct, pairing him with consistent off-field Cryo application is mandatory. Balance offensive pressure with reliable sustain to maintain consistent clear speeds:
1. Premium On-Field Stellar-Conduct Team
| Character | Role | Synergy & Contribution |
| Mitya | Main DPS | Drives on-field Gradient Detonation attacks and triggers continuous Stellar-Conduct. |
| Yae Miko | Off-Field Electro | Supplies potent automated Electro strikes, generates energy particles, and buffers reactions. |
| Odette | Cryo Enabler | Applies steady off-field Cryo aura to maintain uninterrupted Stellar-Conduct triggers. |
| Valeriy | Electro Support | Provides shielding and defensive utility. Exceptionally dominant at C6; can flex to Xilonen or Qiqi. |
2. Sandrone Off-Field Quickswap Team
| Character | Role | Synergy & Contribution |
| Sandrone | Main DPS | Occupies primary field time dealing sustained carry damage while driving reactions. |
| Mitya | Sub-DPS Buffer | Uses Tap Skill (Steady State) to provide automated off-field reaction DMG and teamwide EM. |
| Odette | Cryo Sub-DPS | Ensures consistent Cryo aura for continuous Stellar-Conduct activations. |
| Yae Miko / Flex Sustain | Electro / Defensive | Can run Yae Miko for maximum DPS or swap to Escoffier, Nicole, Xilonen, or Qiqi for healing. |
3. F2P Accessible Stellar-Conduct Team
| Character | Role | Synergy & Contribution |
| Mitya | Main DPS | Acts as the central carry wielding craftable Fruit of Fulfillment or Etherlight Spindlelute. |
| Valeriy | Support / Shield | Provides essential shielding, Electro resonance, and stagger resistance. |
| Sucrose | EM Support | Groups enemies, shreds elemental resistances via Viridescent Venerer, and shares EM. |
| Cryo Traveler | Cryo Enabler | Supplies F2P Cryo application from Burst to trigger Stellar-Conduct reliably. |
Optimal Combat Rotations and Playstyle Tips
On-Field DPS Rotation Blueprint
Sequence: Mitya Hold Skill → Rotate through Supports → Swap back to Mitya → Gradient Detonation Charged Attacks until Beacons empty → Cast Elemental Burst → Follow-up Gradient Detonation.
Execution Nuance: Begin with Mitya's Hold Skill to prime Detection Core: Overload and activate his A1 extended Beacon generation window. Rotate through support skills and Bursts (Odette Cryo, Yae Miko totems, Valeriy shield). Swap back to Mitya to unleash Gradient Detonations. Once Beacons are spent, fire his Elemental Burst to immediately reload 3 Beacons; during the cast, off-field reactions generate the 4th Beacon, seamlessly launching a second Charged Attack string.
Off-Field Sub-DPS Rotation Blueprint
Sequence: Setup Team Buffs → Tap Mitya Elemental Skill → Swap to Main Carry (Sandrone) → Recast Skill before expiry to trigger Final Detonation.
Execution Nuance: Tap Skill plants the Steady State Core, granting passive AoE pulses that follow your active carry. The Core consumes accumulated Beacons for bonus reaction hits and buffs party EM. When the 25-second duration nears its end or when you wish to burst down high-priority targets, swap back and recast Skill to detonate all stored Beacons in one hit.
Essential Gameplay and Build Rules
• Do Not Overcap CRIT Rate: With 20% CRIT Rate from his A4 passive and 16% from the 4pc Deep Shadow set, Mitya gains 36% in-combat CRIT Rate. Keeping his base profile at 64% is optimal.
• Ignore Conventional DMG%: Stellar-Conduct is pure reaction damage. Traditional Electro DMG goblets and Charged Attack bonus buffs are vastly inferior to Elemental Mastery.
• Always Maintain Cryo: Without continuous Cryo application, Mitya cannot generate Gradient Beacons or trigger Stellar-Conduct. Never substitute your Cryo slot.
• Mind Your Energy Thresholds: If running on-field Mitya without a dedicated Electro battery, maintain 150% Energy Recharge to guarantee Burst uptime every rotation.
Conclusion and Final Verdict
Mitya represents a masterclass in modern character design in Genshin Impact, revitalizing the Superconduct reaction family into an elite offensive archetype. By harmonizing raw Elemental Mastery scaling with flexible on-field and off-field stances, he rewards thoughtful team composition and precise resource management. Whether deployed as a dedicated Charged Attack hypercarry or a dynamic quickswap sub-DPS, Mitya is a high-value asset capable of dismantling high-difficulty combat encounters with mathematical elegance.