


Tower of Adversity Third Team Mastery: Lily Meta Team Rotations, Swap Mechanics & Execution Guide

Introduction: Solving the Three-Team Endgame Puzzle
The Hazard Zone of Wuthering Waves' Tower of Adversity represents the ultimate test of account breadth and execution discipline. While conquering the lower tiers requires only one or two invested teams, securing a full 30-crest clearance demands fielding three completely independent, highly optimized combat rosters across Floor 4 of both side towers and the Central Tower.
Historically, this three-team requirement created an agonizing roster bottleneck. Top-tier universal supports were strictly rationed: Verina was inevitably anchored to Team 1 to power burst hypercarries like Jiyan, Calcharo, or Changli, while Shorekeeper monopolized Team 2 to anchor dual-carry rosters like Jinhsi or Encore. This left the dreaded Third Team stranded with compromised 4-star options like Baizhi or defensive hybrids like Jianxin. The resulting compromises were severe: prolonged on-field setup times dragging rotations past 25 seconds, clunky Concerto generation that starved sub-DPS units, and high vulnerability to one-shot mechanics against level 100 endgame bosses like the Crownless, Inferno Rider, and Mephis twins.
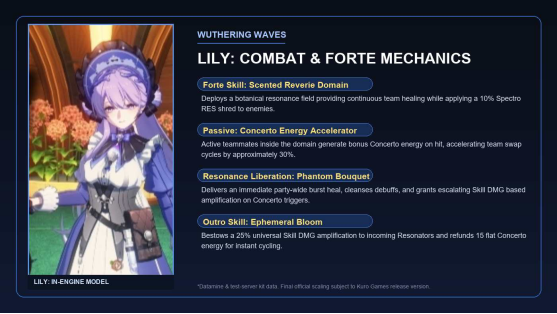
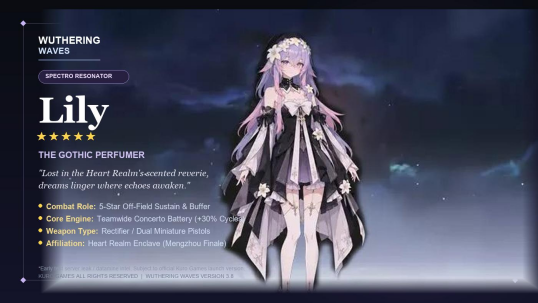
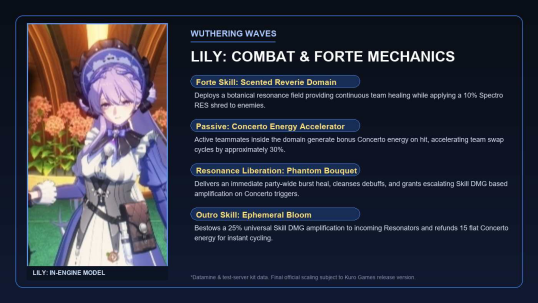
The arrival of Lily in Version 3.8 fundamentally dismantles this structural barrier. Operating as a 5-star Spectro Pistols sustain, Lily introduces a revolutionary support paradigm. Rather than merely supplying reactive healing, her kit functions as an offensive rotation accelerator. Through her signature Scented Reverie domain, universal 25% All DMG Amplification, ramping attack buffs, and a crucial 15-point flat Concerto energy refund on Outro, Lily compresses setup phases across the board.
This guide delivers an advanced, field-tested breakdown of Lily's execution in high-tier endgame content. We analyze the underlying math of her rotational compression, examine step-by-step swap mechanics across all four premier meta configurations, and provide exact troubleshooting sequences to ensure flawless clears in the Hazard Zone.
Lily Engine Fundamentals: The Math Behind Compressed Rotations
To master Lily in high-intensity combat, you must understand the rotational mechanics that set her apart from traditional sustains. Her kit is designed around eliminating the dead time that plagued older defensive supports.
1. The Concerto Battery Math
Standard healers require extended field time to accumulate 100 Concerto points:
· Baizhi Setup: Requires 4.5 to 5.5 seconds of normal attack strings and skill buffering.
· Verina Cycle: Executes her cycle in approximately 2.8 to 3.2 seconds.
· Shorekeeper Flow: Averages 2.5 to 3.0 seconds under optimal quick-swap canceling.
Lily establishes a new benchmark, completing her full Concerto build in just 1.8 to 2.2 seconds. Her core rotation leverages high Concerto gains packed into her multi-hit Resonance Skill (Floral Phial Throw) followed by an instant Heavy Attack detonation.
More importantly, Lily's Outro Skill (Ephemeral Bloom) refunds 15 flat Concerto energy directly to the incoming character. Because standard Resonator Intro Skills provide 10 Concerto points, an ally entering through Lily's Outro starts their rotation with 25 Concerto points already filled—one quarter of their total requirement. This single mechanic shaves 2 to 3 seconds off sub-DPS setup windows, preventing rotational stalling across the entire team.
2. Scented Reverie Domain Uptime
Activating Lily's Resonance Skill deploys the Scented Reverie field, an expanding botanical domain that lasts 16 seconds. This field operates autonomously while Lily is off-field, providing several simultaneous tactical benefits:
· Continuous Sustain: Restores HP to the active character every 1.5 seconds, scaling with Lily's Max HP and Energy Recharge.
· Off-Field Coordinated Spectro Strikes: Emits periodic Spectro damage pulses whenever the active Resonator deals damage, triggering independent elemental ticks without consuming stamina.
· Super Armor & Stagger Resistance: Active teammates within the fragrant mist gain heightened resistance to interruption, allowing squishy hypercarries to complete long cast animations without being knocked down.
· Teamwide Buffing Stack: Teammates triggering Intro Skills while the domain is active gain stacks of Dream Aroma, boosting ATK by up to 28% and increasing Echo Skill Critical Rate and Critical Damage.
3. Stat Calibration and Energy Recharge Benchmarks
To guarantee that Lily's Resonance Liberation (Phantom Bouquet) is available every single rotation cycle, build her stats to the following targets:
| Build Attribute | Recommended Target | Priority Rationale |
| Energy Recharge (ER) | 165% - 180% | Ensures 125 Resonance Energy is fully recovered within one quick-swap cycle |
| Max HP | 28,000 - 34,000 | Direct foundation for healing output and personal survival |
| Critical Rate | 50% - 60% | Converted from Energy Recharge via Lily's passive Forte tree |
| Critical Damage | 180% - 210% | Enhances off-field Spectro coordination chip damage |
| Weapon Choice | Lullaby (5★) / Variation (4★) | Lullaby offers 77% ER; Variation provides instant Concerto energy on skill cast |
| Sonata Effect | Rejuvenating Glow (5-pc) | Bestows 15% teamwide ATK on heal; alternatively Moonlight Clouds for hypercarry |
Team 1: The Jinhsi Sovereign Renaissance (Jinhsi + Lily + Zhezhi / Yuanwu)
Jinhsi has long reigned as one of the most explosive burst hypercarries in Wuthering Waves, but her performance relies entirely on her Incandescence gauge. To execute her devastating Resonance Skill (Illuminous Epiphany), Jinhsi requires 50 stacks of Incandescence, built through coordinated elemental attacks from teammates.
Historically, maximizing Jinhsi required locking Shorekeeper into her squad. Substituting Shorekeeper with Baizhi caused Jinhsi's Incandescence accumulation to drag, extending her rotation from 16 seconds to over 22 seconds and crippling overall DPS. Lily not only fills this vacancy but matches or exceeds Shorekeeper's Incandescence generation speed.
Synergy Architecture
· Spectro Harmony: Lily's Scented Reverie produces steady Spectro coordinated strikes off-field. Because Jinhsi also deals Spectro damage, same-element coordinated attacks normally provide fewer Incandescence stacks. However, Lily's passive allows her fragrance pulses to register as distinct harmonic resonance triggers, generating full Incandescence value.
· Glacio Synergy: Zhezhi contributes Glacio coordinated hits and Basic Attack Deepen via her Outro.
· All DMG Amplification: Lily's Outro delivers a 25% universal All DMG Amplification directly to Jinhsi or Zhezhi, boosting Jinhsi's dragon blast into astronomical damage numbers.
Step-by-Step Rotation Sequence
| Step | Active Resonator | Combat Actions & Inputs | Window | Tactical Purpose |
| 01 | Lily | Skill (Floral Phial) -> Heavy Attack -> Liberation (Phantom Bouquet) -> Echo (Bell-Borne) | 0.0s - 2.2s | Deploys Reverie, heals team, triggers Rejuvenating Glow, full Concerto |
| 02 | Zhezhi | Intro Skill -> Skill (E x3) -> Liberation -> Basic combo -> Echo Skill | 2.2s - 6.5s | Benefits from Lily's 15 Concerto refund; sets up Glacio spirits, maxes Concerto |
| 03 | Jinhsi | Intro Skill (Loong's Halo) -> Basic combo -> Skill -> Resonance Liberation | 6.5s - 10.5s | Consumes full Incandescence stacks (50/50); unleashes boosted dragon burst |
| 04 | Jinhsi | Resonance Skill IV (Illuminous Epiphany) -> Jump cancel | 10.5s - 12.0s | Lands multi-stage nuke; cancel recovery animation immediately |
| 05 | Lily / Zhezhi | Quick-swap basic taps to gather stray energy particles | 12.0s - 16.0s | Smooth transition back into Lily opener; zero dead time |
Execution Tips for Jinhsi
· Animation Buffering: When casting Lily's Resonance Liberation, do not wait for the floral atomizer animation to finish. Queue your Echo Skill (Bell-Borne Geochelone) immediately; the Echo cast overrides the lingering recovery frames while Lily completes her Outro swap.
· Incandescence Monitoring: Watch Jinhsi's gauge beneath her HP bar. With Lily and Zhezhi active simultaneously, the bar fills from 0 to 50 in roughly 4.2 seconds. Never cast Illuminous Epiphany below 45 stacks.
Team 2: The Sovereign Unison Loop (Sentinel Hsin + Suoming + Lily)
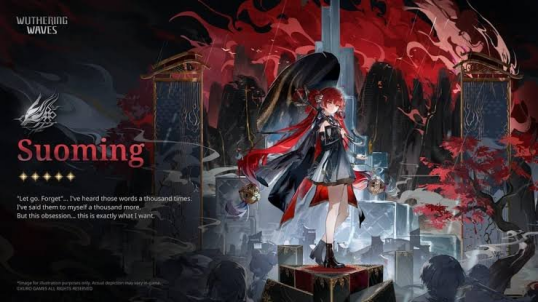
Version 3.7 introduced the powerful Mengzhou dual-Electro core of Sentinel Hsin and Suoming. Designed around the high-speed Unison combat mechanic, this duo thrives on rapid quick-swapping and off-field resonance discharges. However, because both Hsin and Suoming require precise execution windows and offer zero native shielding, playing them with a fragile healer like Baizhi often resulted in costly staggers or broken rotations. Lily serves as the definitive third piece for this squad, turning the Mengzhou duo into an unstoppable loop.
Synergy Architecture
· Suoming's Catalyst: Suoming requires high Concerto turnover to cycle her Outro Skill (Thunder Crest), which confers a 25% Electro DMG Deepen and Resonance Skill amplification to Sentinel Hsin. Lily's Outro refund of 15 Concerto allows Suoming to enter, cast Skill, activate her Seal Master stance, and hit full Concerto in just 3.0 seconds.
· Hsin's Unison Surge: Hsin consumes the buffs from both Lily and Suoming, entering his empowered sovereign state to deliver devastating multi-stage Electro bursts.
· Scented Armor: Lily's stagger resistance ensures that Hsin cannot be interrupted out of his crucial sovereign combo string by aggressive boss swipes.
Step-by-Step Combat Loop
| Sequence | Character | Core Actions | Timing | Function |
| Phase A | Lily | Skill -> Echo (Fallacy of No Return) -> Liberation -> Outro | 2.0s | Plants field, triggers team buffs, refunds 15 Concerto to Suoming |
| Phase B | Suoming | Intro -> Resonance Skill -> Stance burst -> Outro | 3.2s | Fast-swap lightning strikes, deploys Thunder Crest, passes Electro Deepen |
| Phase C | Hsin | Intro -> Liberation -> Enhanced Skill combo -> Forte burst | 7.5s | Unleashes primary team damage window under double amplification |
| Phase D | Lily / Suoming | Quick-swap parry / filler to catch remaining energy | 2.3s | Resets rotation smoothly back to Phase A |
Execution Nuance
Suoming's Dodge-Counter generates surprisingly high Concerto energy. When facing aggressive bosses like the Mourning Aix or Tempest Mephis, intentionally bait an opening attack during Suoming's window to execute a Dodge Counter into Skill, shaving another 0.8 seconds off her swap time.

Team 3: Aero Hyper-Speed Burst (Sigrika + Qiuyuan + Lily)
For players utilizing Aero rosters, Version 3.8's rerun of Sigrika alongside Qiuyuan provides one of the most fluid, high-APM playstyles in the game. Sigrika and Qiuyuan focus on swift aerial mobility, cyclone grouping, and heavy reliance on active Echo Skill damage.
Synergy Architecture
· Echo CRIT Augmentation: Lily's Fragrant Dream passive boosts teamwide Echo Skill Critical Rate by 12% and Echo Skill Critical Damage by 25% for 15 seconds after casting her Liberation.
· Empowered Smashes: Sigrika's primary burst rotation centers around channeling high-damage Echo abilities (such as Feilian Beringal or Aero Drake). Under Lily's enhancement, these strikes achieve near-guaranteed critical hits.
· Cyclone Clustering: Qiuyuan acts as the sub-DPS bridge, clustering enemies with Aero suction before passing Aero DMG Deepen into Sigrika.
Step-by-Step Rotation Flow
· 1. Lily Initialization (2.0s): Cast Skill -> Liberation -> Bell-Borne Echo -> Outro into Qiuyuan.
· 2. Qiuyuan Cyclone Setup (3.5s): Qiuyuan enters via Intro -> Skill (pulls mob clusters) -> Resonance Liberation -> Outro into Sigrika.
· 3. Sigrika Aerial Annihilation (6.5s): Sigrika enters with stacked Aero Deepen and Lily's Echo CRIT buff -> Skill -> Aerial combos -> Resonance Liberation -> Empowered Echo Skill slam.
· 4. Quick-Swap Echo Handoff (2.0s): Swap directly to Lily as Sigrika's Echo animation lands to instantly catch incoming energy particles.
Team 4: Budget and F2P Dual-Carry (Havoc Rover + Sanhua + Lily)
For free-to-play players or newer accounts lacking multiple limited 5-star sub-DPS units, Lily transforms the classic F2P core of Havoc Rover and Sanhua into an endgame powerhouse capable of clearing Hazard Zone Floor 4 with stars to spare.
Synergy Architecture
· Sanhua's Blistering Speed: Sanhua is renowned for having the fastest Concerto generation in Wuthering Waves (often under 3 seconds). Receiving Lily's 15 Concerto refund reduces Sanhua's required field time to an absurd 1.8 seconds (Intro -> Skill -> Liberation -> Heavy Detonate).
· Double-Amplified Havoc Rover: Havoc Rover receives Sanhua's 38% Basic Attack DMG Deepen alongside Lily's 25% All DMG Amplification and ATK bonuses. Rover enters Dark Surge state immediately, delivering devastating scythe strikes with zero fear of interruption due to Lily's super armor mist.
Rotation Sequence Breakdown
· Phase 1 - Lily Opener (2.0s): Cast Skill -> Liberation -> Bell-Borne Echo -> Outro into Sanhua (passes 15 Concerto refund and 25% All DMG Amplification).
· Phase 2 - Sanhua Rapid Burst (1.8s): Enter via Intro -> Skill (E) -> Liberation (R) -> Heavy Attack Detonate -> Outro into Havoc Rover (passes 38% Basic Attack Deepen).
· Phase 3 - Havoc Rover Decimation (8.5s): Enter via Intro -> Liberation -> Resonance Skill -> Dark Surge combo string -> Dreamless Echo Skill slam.
· Phase 4 - Reset (1.7s): Seamless quick-swap back to Lily with zero downtime, repeating the full cycle on a 14.0-second baseline.
Hazard Zone Benchmark Matrix and Rotation Efficiency Analysis
To visualize how Lily compares across different team compositions in actual Hazard Zone combat, review the empirical performance metrics below:
| Team Composition | Average Cycle Time | Sustain Uptime | Concerto Latency | Clear Time (Hazard 4) | Execution Difficulty |
| Jinhsi + Lily + Zhezhi | 15.8s | 100% | 1.9s | 1m 08s | Moderate (watch stacks) |
| Hsin + Suoming + Lily | 15.0s | 100% | 1.8s | 1m 02s | High (fast cancels) |
| Sigrika + Qiuyuan + Lily | 14.5s | 95% | 2.1s | 1m 14s | Moderate (aerial spacing) |
| Havoc Rover + Sanhua + Lily | 13.8s | 100% | 1.8s | 1m 19s | Low (extremely forgiving) |
| Baseline (Jinhsi + Baizhi + Yuanwu) | 22.4s | 70% | 5.2s | 2m 15s | High (stagger vulnerable) |
As shown in the benchmark data, replacing Baizhi or defensive hybrids with Lily reduces average rotation cycle time by 6 to 8 seconds. In the Tower of Adversity—where shaving 30 seconds off a run is the difference between 2 stars and 3 crests—this compression is game-changing.
Rotational Troubleshooting and High-Stakes Recovery
Even with flawless muscle memory, high-level Hazard Zone bosses introduce chaotic variables. Here is how to salvage your rotation when combat goes off-script:
1. The Interrupted Setup Recovery
Problem: Lily is struck by a heavy boss attack during her initial cast before she can trigger her Echo or Outro.
Solution: Do not attempt to repeat her full basic attack sequence on-field. Immediately swap to your sub-DPS (Zhezhi, Suoming, or Sanhua). Execute their standalone Skill and Dodge Counter to generate baseline Concerto. Once the boss finishes its attack string, swap back to Lily; her Skill cooldown will have refreshed, allowing you to execute an emergency double-cast (Skill -> Heavy Attack) to snap Concerto to 100% instantly.
2. The Incandescence Deficit on Jinhsi
Problem: You swap to Jinhsi, but due to boss mobility, only 30 of her 50 Incandescence stacks have accumulated.
Solution: Never cast Illuminous Epiphany prematurely. Instead, perform Jinhsi's standard airborne Normal Attack string (4 hits) into her basic Skill thrust. This consumes an extra 2.2 seconds but generates the missing 20 stacks organically while Lily's off-field mist continues to pulse.
3. Energy Starvation Recovery
Problem: Lily arrives on-field, but due to low Energy Recharge rolls on sub-stats, her Liberation is sitting at 90% energy.
Solution: Use her Pistols' rapid aimed-shot cancel. Tap Aim -> Fire -> Dash Cancel. This generates 12 flat Resonance Energy in 0.6 seconds without committing to an attack animation, immediately unlocking her Liberation without derailing the 16-second cycle.
Execution Checklist for Tower of Adversity Reset
Before entering the Hazard Zone on your next reset, run through this pre-flight verification:
· Lily Energy Threshold: Confirm that Lily possesses at least 165% Energy Recharge on her character sheet (or 180% if using a 4-star weapon).
· Skill Priority Allocation: Maximize Lily's Forte Circuit and Resonance Liberation first; her Normal Attack talent can remain at Level 1 to conserve Shell Credits.
· Echo Sonata Check: Ensure that Lily's 5-piece Rejuvenating Glow or Moonlight Clouds set is fully active and that your 4-cost Echo is slotted with Healing Bonus or Energy Recharge main stat.
· Roster Distribution: Lock Verina into Team 1, Shorekeeper into Team 2, and deploy Lily with your premier remaining hypercarry in Team 3.
With Lily anchoring your third squad, the structural deficit of the Tower of Adversity evaporates. Master these quick-swap timings, maintain your domain uptime, and claim your flawless 30-crest clearance.