


Alyosha Build Deep Dive: Weapons, Artifacts, and Team Comps for an Electro Off-Field Healer

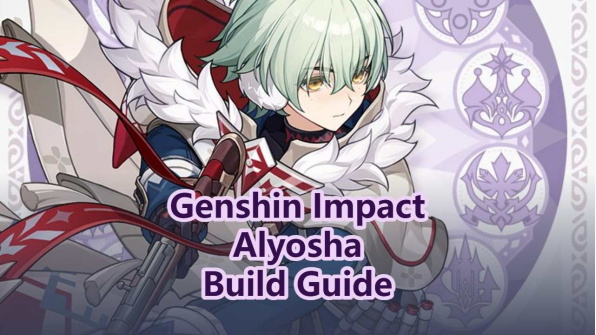
Alyosha has a very clear role: he is not a long-field Electro main DPS, but a 4-star Electro polearm support and healer built around Elemental Skill, Elemental Burst, and off-field Electro coverage. His value comes from three things: steady off-field Electro damage, team healing, and extra support for Stellar-Conduct teams inside a Polestar Field.
A quick note first: Alyosha's information should still be treated as pre-release guide material. If his multipliers, weapon synergy, or reaction mechanics are adjusted after official release, the final build direction should follow the in-game version.
Alyosha Build Quick View
| Item | Recommended Direction |
| Rarity | 4-star |
| Element | Electro |
| Weapon | Polearm |
| Ascension stat | Energy Recharge |
| Core role | Off-field Electro support / healer / Stellar-Conduct buffer |
| Talent priority | Elemental Burst > Elemental Skill >>> Normal Attack |
| Best artifact set | 4-piece Noblesse Oblige |
| Main stats | Sands: ATK% / Energy Recharge; Goblet: ATK%; Circlet: ATK% |
| Sub-stats | Energy Recharge > ATK% > CRIT Rate |
| Constellation advice | C0 works, C2 is the best value stopping point, C6 has the highest ceiling |
Role and Kit Overview

Alyosha's Elemental Skill, Thunderbolt Ambush, applies Hunter's Mark to enemies and grants him Hunter's Precision. The Skill can be tapped for a fast shot or held for an aimed version; in most rotations, the tap version saves more time.
His Elemental Burst, Hunter's Advance, summons Tugarin and creates a Fulgurite Hunting Field in front of him. This field can taunt nearby enemies and periodically deals AoE Electro damage. Tugarin's attacks also heal party members based on Alyosha's ATK.
The most important point is his passive synergy: Energy Recharge can be converted into Skill and Burst damage, and inside a Polestar Field, the Radiance: Stellar-Conduct state lets Hunter's Precision grant a Stellar-Conduct damage bonus to nearby party members.
Talent Leveling Priority
| Talent | Recommended Level | Notes |
| Elemental Burst: Hunter's Advance | 9-10 | Main source of off-field damage, Electro coverage, and healing. |
| Elemental Skill: Thunderbolt Ambush | 9-10 | Applies Hunter's Mark and triggers Hunter's Precision. |
| Normal Attack: Skirmishing Spear | 1-6 | Rarely used for damage in real rotations, so it can wait. |
Alyosha's Burst defines his contribution. While Fulgurite Hunting Field is active, the main DPS can take the field while Alyosha still supplies Electro application, damage, and healing from the back line.
His Skill is the rotation starter and refresher. It deals Electro damage, applies Hunter's Mark, and enables his follow-up buffs. Normal Attack should stay last unless you are building a fun on-field variant.
Best Weapons for Alyosha
Alyosha values Energy Recharge, ATK, and passive effects that improve team rotation. More Energy Recharge means easier Burst uptime, while more ATK improves Tugarin's healing.
| Priority | Weapon | Why It Works |
| 1 |  Engulfing Lightning |
High Energy Recharge and ATK conversion make it excellent for his damage, healing, and rotation needs. |
| 2 |  Favonius Lance |
A practical low-cost option. Particle generation reduces Energy pressure for the whole team. |
| 3 |  Song of the Vigil |
Good for reaction teams; it restores Energy after reactions and can add ATK value in Stellar-Conduct/Stellar Swirl teams. |
| 4 |  Tamayuratei no Ohanashi |
Boosts ATK after using Skill, improving feel and healing, though it is less team-oriented than Favonius Lance. |
| 5 |  The Catch |
Free and accessible, with Elemental Burst damage and CRIT Rate bonuses for a more damage-focused build. |
If you want the simplest general option, Favonius Lance is usually the smoothest answer. If you already have an unused Engulfing Lightning, Alyosha can lean into higher ATK and Energy Recharge at the same time.
Artifacts and Main Stats

| Slot | Recommended Main Stat |
| Sands | ATK% / Energy Recharge |
| Goblet | ATK% |
| Circlet | ATK% |
| Sub-stats | Energy Recharge > ATK% > CRIT Rate |
The recommended set is 4-piece Noblesse Oblige. Alyosha already wants to use his Burst every rotation, and Noblesse turns that Burst into a teamwide ATK buff, matching his support role very naturally.
If his Burst is not available every rotation, choose Energy Recharge Sands first. If the team already has Raiden Shogun, Favonius weapons, or other Energy support, ATK% Sands can improve both healing and damage.
Recommended Stellar-Conduct Teams
| Main DPS | Support | Support | Support |
| Sandrone | Odette | Alyosha | Yae Miko |
| Wriothesley | Odette | Alyosha | Yae Miko |
| Sandrone | Odette | Alyosha | Qiqi |
Sandrone + Odette + Alyosha + Yae Miko
This is a premium Stellar-Conduct team. Sandrone acts as the main DPS, Odette provides Cryo and the Stellar reaction environment, Alyosha adds Electro coverage, healing, and team buffs, while Yae Miko supplies extra off-field Electro damage.
Wriothesley + Odette + Alyosha + Yae Miko
Wriothesley has a stable on-field damage rhythm and works well with Alyosha's off-field Electro plus Odette's reaction setup. Alyosha's healing also lowers HP pressure.
Sandrone + Odette + Alyosha + Qiqi
If you want more forgiveness, Qiqi can replace Yae Miko. The damage ceiling falls, but survivability becomes much more comfortable.
Non-Stellar Team Options
| Main DPS | Support | Support | Support |
| Varessa | Chevreuse | Alyosha | Fischl |
| Clorinde | Xingqiu | Alyosha | Sucrose |
| Flins | Aino | Alyosha | Sucrose |
| Arlecchino | Chevreuse | Alyosha | Fischl |
| Raiden Shogun | Furina | Alyosha | Jean |
Even outside Stellar-Conduct, Alyosha can still work as a general Electro off-field healer in Aggravate, Electro-Charged, Overloaded, and mixed Electro teams. His buff value drops, but his rotation support, Electro application, and healing remain useful.
Constellation Pull Advice
| Constellation | Value | Notes |
| C1 | High | Restores Energy for Alyosha after Electro-related reactions, noticeably improving Burst uptime. |
| C2 | Very high | Extends Burst duration and lets Tugarin automatically apply Hunter's Mark. This is the most recommended stopping point. |
| C4 | Medium-high | Strengthens healing by restoring HP to the lowest-HP nearby party member. |
| C6 | Extremely high | Allows Hunter's Precision to stack twice and adds Elemental Mastery at full stacks, greatly raising reaction-team ceiling. |
C0 Alyosha already performs his basic off-field Electro, healing, and buffing jobs, so most players do not need to chase constellations. C2 gives the most direct long-term value, while C6 is for players chasing the full reaction-support ceiling.
Build Conclusion
Alyosha's value is not about one huge hit; it is about putting off-field Electro, healing, and team utility into one slot. Build him by securing Burst uptime first, then tune ATK, Energy Recharge, and CRIT Rate according to the team.